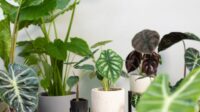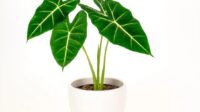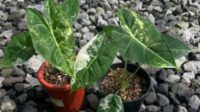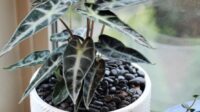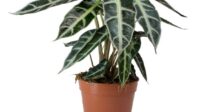
Alocasia Elephant Ear, known for its dramatic, oversized leaves and lush tropical appearance, is a favorite among indoor gardeners and plant enthusiasts. To keep this beauty thriving, understanding its specific soil needs is crucial. Soil is more than just a medium to hold the plant in place—it directly impacts water retention, nutrient availability, and root health. Let’s dive deep into how to choose and create the best soil for your Alocasia Elephant Ear, ensuring its roots stay healthy and its foliage vibrant.
Why Soil Choice is Critical for Alocasia Elephant Ear
Native to tropical rainforests, Alocasia plants grow in loose, nutrient-rich soil that drains well while retaining enough moisture to sustain their rapid growth. Replicating this environment indoors is key to their success. Here’s why soil selection matters:
- Root Health:
Alocasia plants have sensitive roots that are prone to rot in waterlogged conditions. The right soil mix will strike a balance between moisture retention and drainage, ensuring roots remain hydrated but not oversaturated. - Nutrient Availability:
These fast growers rely on a steady supply of nutrients to produce their large, iconic leaves. A nutrient-rich soil mix provides the essential elements for sustained growth. - Oxygenation:
Compact, dense soils can suffocate roots by cutting off oxygen flow. A well-aerated soil ensures proper respiration, vital for root development and overall plant health. - Water Management:
Alocasia plants thrive in soil that retains moisture without becoming soggy. The right mix ensures even water distribution and prevents root stress.
Key Characteristics of the Ideal Soil for Alocasia Elephant Ear
The perfect soil for Alocasia Elephant Ear should meet the following criteria:
- Well-Draining:
- Allows excess water to flow freely, reducing the risk of waterlogged roots.
- Prevents fungal infections like root rot, a common problem in overly wet conditions.
- Moisture Retentive:
- Retains enough water to keep the plant hydrated between waterings.
- Mimics the consistent moisture levels of tropical environments.
- Rich in Organic Matter:
- Provides nutrients to fuel the plant’s vigorous growth.
- Improves soil texture and water-holding capacity.
- Aerated and Chunky:
- Ensures oxygen reaches the roots, promoting healthy growth.
- Prevents soil compaction, especially in potted environments.
- Slightly Acidic to Neutral pH:
- Alocasia prefers soil with a pH range of 5.5 to 7.0.
- A balanced pH allows optimal nutrient absorption.
Creating the Perfect Soil Mix for Alocasia Elephant Ear
For the best results, you can either purchase a high-quality aroid mix or create your own blend. Here’s a tried-and-true recipe:
DIY Soil Mix
- Base:
- 1 Part Indoor Potting Mix: This provides a foundational organic matter and basic nutrients.
- Aeration:
- 1 Part Perlite or Pumice: These materials improve drainage and aeration, preventing compaction.
- Moisture Retention:
- 1 Part Coconut Coir or Peat Moss: Both hold moisture effectively without waterlogging the soil.
- Structure:
- 1 Part Orchid Bark or Coarse Sand: Adds a chunky texture, ensuring air pockets for oxygenation.
- Optional Enhancements:
- Horticultural Charcoal: Absorbs impurities and prevents odors from stagnant water.
- Compost or Worm Castings: Boosts organic nutrients, encouraging robust growth.
This blend closely replicates the tropical forest floor where Alocasia naturally thrives, making it ideal for indoor cultivation.
Step-by-Step Potting Instructions
Once you have the ideal soil mix ready, follow these steps to repot or pot your Alocasia Elephant Ear:
- Choose the Right Pot:
- Opt for a pot with drainage holes to prevent water buildup.
- A terracotta pot is a great choice as it helps wick away excess moisture.
- Prepare the Pot:
- Place a layer of gravel, stones, or broken pottery at the bottom to enhance drainage further.
- Add Soil Mix:
- Fill the pot with your prepared soil mix, leaving enough room for the plant’s root ball.
- Position the Plant:
- Gently place the Alocasia Elephant Ear in the pot, ensuring the roots are spread out.
- Cover with more soil mix, patting it down lightly without compacting.
- Water Thoroughly:
- After potting, water the plant deeply to help the soil settle and hydrate the roots.
Common Soil-Related Mistakes and How to Avoid Them
Even with the best intentions, certain pitfalls can harm your Alocasia. Here’s what to watch out for:
- Using Dense Soil:
Heavy, clay-based soils retain too much water and lack the aeration Alocasia needs. Always opt for a mix with good drainage. - Overwatering:
Even with the right soil, overwatering can lead to root rot. Allow the top inch of soil to dry before watering again. - Ignoring Soil Quality Over Time:
Over time, soil can become compacted or depleted of nutrients. Refresh the soil annually or add slow-release fertilizer to replenish nutrients. - Neglecting pH Levels:
If the soil is too acidic or too alkaline, nutrient uptake may be hindered. Use a pH testing kit and amend the soil as needed.
Why Your Alocasia Elephant Ear Deserves the Best Soil
Providing the ideal soil for your Alocasia Elephant Ear is an investment in its long-term health and beauty. Healthy roots are the foundation of a thriving plant, and with the right mix, your Alocasia will reward you with robust growth and breathtaking foliage.
Whether you’re a seasoned indoor gardener or a beginner, mastering the art of soil preparation is a vital step toward becoming a confident Alocasia caretaker. Take the time to craft the perfect soil mix, and your Alocasia Elephant Ear will flourish, transforming your space into a lush, tropical paradise.

