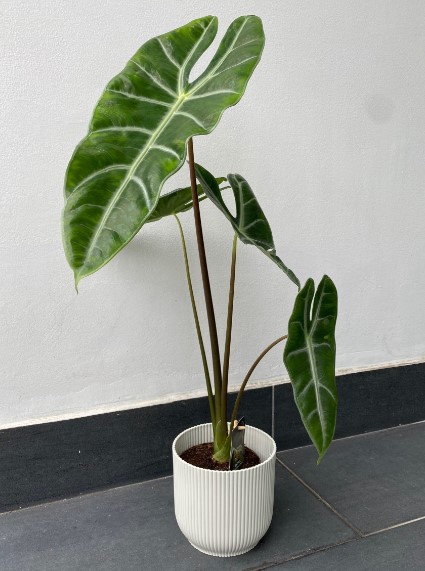
Alocasia plants, with their dramatic foliage and tropical charm, are perfect additions to any home or garden. However, for new plant enthusiasts, the process of planting these beauties might seem a bit daunting. From choosing the right soil to ensuring proper lighting, each step plays a crucial role in the plant’s success. This comprehensive guide will walk you through every detail, ensuring that your Alocasia thrives and becomes the star of your indoor or outdoor garden.
1. Understanding Alocasia Varieties
Before planting, familiarize yourself with the specific Alocasia variety you’re working with.
– Popular Varieties for Beginners:
– Alocasia Polly: Compact and easy to manage.
– Alocasia Zebrina: Known for its striking patterned stems.
– Alocasia Macrorrhiza: Ideal for larger spaces due to its size.
2. Selecting the Right Pot
Choosing the appropriate pot is essential for the plant’s growth.
– Size Matters: Pick a pot slightly larger than the plant’s root ball to allow room for growth.
– Drainage: Ensure the pot has drainage holes to prevent waterlogging.
– Material: Terra-cotta pots are excellent for regulating moisture, while plastic pots retain water better.
3. Preparing the Soil Mix
Alocasias thrive in well-draining, nutrient-rich soil.
– Recommended Soil Mix:
– 50% potting soil.
– 25% perlite or pumice for aeration.
– 25% orchid bark or coconut coir for organic matter.
– pH Range: Aim for a slightly acidic to neutral pH (6.0–7.0).
4. Choosing the Right Location
Light and temperature play significant roles in the success of your Alocasia.
– Light Requirements: Bright, indirect light is ideal. Direct sunlight can scorch the leaves.
– Temperature Range: Maintain temperatures between 65°F and 85°F (18°C–29°C).
– Indoor Placement: Near an east or north-facing window works best.
5. Planting Your Alocasia: Step-by-Step
Follow these steps to plant your Alocasia correctly:
- Prepare the Pot: Fill the pot with the prepared soil mix, leaving enough room for the root ball.
- Position the Plant: Gently place the Alocasia in the pot, ensuring the base of the plant is level with the soil surface.
- Fill the Pot: Add more soil around the roots, pressing gently to secure the plant.
- Water Thoroughly: After planting, water the plant until moisture drains from the bottom of the pot.
6. Watering Tips
Proper watering is crucial for Alocasias.
– When to Water: Check the top 1–2 inches of soil. If dry, it’s time to water.
– How to Water: Water evenly until it drains from the pot’s base. Discard any excess water in the saucer.
– Avoid Overwatering: Soggy soil can lead to root rot, a common issue for Alocasias.
7. Fertilizing Your Alocasia
Fertilization provides the nutrients needed for robust growth.
– Frequency: Fertilize every 4–6 weeks during spring and summer.
– Type: Use a balanced liquid fertilizer diluted to half strength.
– Avoid Fertilizing: Skip during the dormant period (fall and winter).
8. Humidity Requirements
Alocasias thrive in humid conditions, replicating their tropical origins.
– Ideal Humidity Level: Maintain at least 60% humidity.
– Boosting Humidity:
– Place a humidifier near the plant.
– Group plants together to create a microclimate.
– Use a pebble tray with water under the pot.
9. Caring for Newly Planted Alocasia
After planting, extra care is needed to help the plant settle.
– Monitor Growth: Keep an eye on new leaves as a sign of healthy adaptation.
– Adjust Watering: Be cautious not to overwater during the first few weeks.
– Light Exposure: Ensure consistent, bright, indirect light.
10. Pruning and Maintenance
– Remove Yellowing Leaves: Cut off any leaves that turn yellow to encourage fresh growth.
– Clean Leaves: Wipe with a damp cloth to remove dust and enhance photosynthesis.
11. Repotting Your Alocasia
Alocasas should be repotted every 1–2 years or when they outgrow their pot.
– Signs It’s Time to Repot:
– Roots growing out of the drainage holes.
– Soil dries out too quickly after watering.
– Repotting Steps:
– Use a larger pot and fresh soil.
– Handle roots gently to avoid damage.
12. Common Problems and Solutions
– Yellowing Leaves: Often caused by overwatering or inadequate light.
– Drooping Leaves: Indicates underwatering or sudden temperature changes.
– Pest Issues: Treat spider mites or mealybugs with neem oil or insecticidal soap.
13. Propagating Alocasia
Expand your collection with propagation.
– Division Method:
– Separate offsets (baby plants) during repotting.
– Ensure each division has a healthy root system.
– Plant in fresh soil and water lightly.
14. Decorating with Alocasia
Alocasia plants make stunning decor additions.
– Indoor Placement: Use as a centerpiece in living rooms or offices.
– Pot Styling: Pair with minimalist or tropical-themed pots to enhance its beauty.
15. Why Plant Alocasia?
– Tropical Vibes: Adds an exotic feel to your home or garden.
– Air Purification: Improves indoor air quality.
– Low Maintenance: Suitable for beginners when proper care is provided.
Conclusion
Planting Alocasia doesn’t have to be intimidating. With the right tools, knowledge, and care, you can enjoy the beauty and charm of this tropical wonder in your home or garden. By following this step-by-step guide, even beginners can confidently plant and nurture Alocasia varieties, ensuring they thrive and grow into stunning focal points. Happy planting!
Whether you’re trying to decide which to add to your collection or simply curious about their differences, this guide will help you explore their similarities, care requirements, and unique traits.


