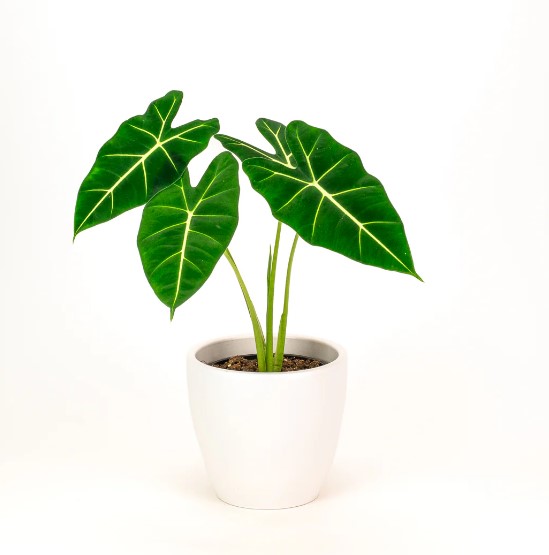
The Black Velvet Dwarf Alocasia is a stunning houseplant beloved for its compact size and luxurious, velvety black leaves. This exotic beauty, scientifically known as *Alocasia reginula*, is perfect for plant enthusiasts who want a striking addition to their indoor collection. However, its delicate appearance comes with specific care requirements. By providing the right environment and attention, you can help your Black Velvet thrive and become a showpiece in your home.
1. Understanding the Black Velvet Dwarf Alocasia
– Key Features:
– Dark, velvety leaves with striking silver veins.
– Compact growth habit, reaching 12–18 inches in height.
– Perfect for small spaces and indoor displays.
– Origin: Native to Southeast Asia, this plant is accustomed to tropical climates with high humidity and indirect light.
2. Light Requirements
The Black Velvet Dwarf Alocasia thrives in specific lighting conditions:
– Bright, Indirect Light: Ideal for maintaining vibrant leaf color and healthy growth.
– Avoid Direct Sunlight:Harsh rays can scorch the delicate leaves.
– Artificial Lighting: Can adapt well to grow lights if natural light is insufficient.
3. Temperature Preferences
– Ideal Range: 65°F–85°F (18°C–29°C).
– Cold Sensitivity:Avoid exposing the plant to temperatures below 60°F (15°C).
– Placement Keep away from cold drafts or heat sources like air conditioners and radiators.
4. Humidity Needs
High humidity is essential for this tropical plant.
– Optimal Level: 60–80%.
– Humidity Boost Tips:
– Use a humidifier near the plant.
– Place the pot on a pebble tray filled with water.
– Group plants together to create a humid microclimate.
5. Watering Guidelines
The Black Velvet Alocasia is sensitive to overwatering, so balance is key.
– When to Water:Allow the top 2 inches of soil to dry before watering.
– Watering Frequency: Adjust based on the environment; water less frequently in winter.
– Signs of Overwatering: Yellowing leaves or mushy stems.
– Signs of Underwatering: Drooping leaves and crispy edges.
6. Soil Preferences
This plant thrives in well-draining, nutrient-rich soil.
– Recommended Soil Mix:
– 50% potting soil.
– 25% perlite or pumice for aeration.
– 25% orchid bark or coconut coir for moisture retention.
– pH Range: Slightly acidic to neutral (6.0–7.0).
7. Fertilization Tips
Regular feeding helps maintain lush, vibrant growth.
– Frequency: Feed every 4–6 weeks during the growing season (spring and summer).
– Type: Use a balanced liquid fertilizer diluted to half strength.
– Avoid Over-Fertilizing: Excess nutrients can burn the roots and damage the leaves.
8. Potting and Repotting
As a slow grower, the Black Velvet doesn’t need frequent repotting.
– When to Repot: Every 1–2 years or when roots outgrow the pot.
– Pot Choice: Use a pot with drainage holes to prevent waterlogging.
– Steps for Repotting:
- Carefully remove the plant from its pot and inspect the roots.
- Trim any damaged or rotting roots.
- Replant in fresh soil and water lightly.
9. Pruning and Maintenance
– Prune Damaged Leaves: Use sterilized scissors to remove yellowing or browning leaves.
– Clean the Leaves:Dust regularly with a damp cloth to enhance photosynthesis and prevent pests.
10. Pests and Diseases
Common pests for Black Velvet Alocasia include spider mites, mealybugs, and aphids.
– Prevention:
– Inspect the plant regularly, especially under the leaves.
– Keep humidity high to deter pests.
– Treatment:
– Use neem oil or insecticidal soap at the first sign of infestation.
– Isolate the affected plant to prevent spreading.
11. Managing Dormancy Periods
In cooler months, the Black Velvet Alocasia may enter dormancy.
– Signs of Dormancy: Slower growth and occasional leaf drop.
– Dormancy Care:
– Reduce watering frequency but don’t let the soil dry out completely.
– Stop fertilizing until spring.
– Maintain warmth and humidity during dormancy.
12. Propagation Techniques
Expand your collection or share this beauty with others through propagation.
– Best Method: Rhizome division during repotting.
– Steps for Propagation:
- Separate offsets or baby plants from the main rhizome.
- Ensure each division has healthy roots and at least one leaf.
- Plant in fresh soil and provide a humid environment.
13. Common Problems and Solutions
– Yellowing Leaves:
– Cause: Overwatering or insufficient light.
– Solution: Adjust watering and improve light exposure.
– Brown Leaf Edges:
– Cause: Low humidity or underwatering.
– Solution: Increase humidity and water consistently.
– Drooping Leaves:
– Cause: Underwatering or sudden environmental changes.
– Solution: Check soil moisture and stabilize the plant’s conditions.
14. Displaying Your Black Velvet Alocasia
– Indoor Placement:Ideal for desks, shelves, or as a centerpiece in small spaces.
– Pot Styling: Pair with modern or minimalist pots to highlight its velvety leaves.
– Lighting Tips: Place near east-facing windows for optimal light exposure.
15. Why the Black Velvet Dwarf Alocasia is Worth the Effort
– Unique Appearance: Its velvety black leaves with silver veins are unparalleled in the plant world.
– Compact Size: Perfect for collectors with limited space.
– Conversation Starter: Adds an exotic and luxurious touch to any collection.
Conclusion
The Black Velvet Dwarf Alocasia is a stunning, compact plant that thrives with proper care and attention. While its unique beauty demands specific conditions, the rewards of nurturing this exotic gem are well worth the effort. With the tips in this guide, you can create the perfect environment to help your Black Velvet Alocasia flourish, ensuring it remains a vibrant centerpiece in your collection for years to come.
